I sing of chairs and a (wo)man! My dining chair refinishing/reupholstering epic is finally over. Truth be told, I actually finished them up about a month ago - but December is always crazy busy and I was lazy about downloading and editing all the pictures I took of the process. But I’m really psyched about the way they came out, so I’m excited to talk about them now!
Here’s the backstory: my parents gave us four Queen Anne-style chairs that had originally belonged to my great-grandmother and were subsequently used by my grandmother and later, my parents. I remember our family using them when we were younger, but they had been in my parents’ basement for at least ten or fifteen years. We were pretty excited to get them, because they’re in pretty good shape and we needed some dining room furniture, as we’ve never actually had a dining room before. Because we were planning on getting a big table, we picked up two additional chairs at a local used furniture store in Old Orchard Beach. They weren’t a perfect match, but since they also had generally the same “honey oak” wood tone, tall backs and upholstered seats, I thought they’d look pretty well together.
 |
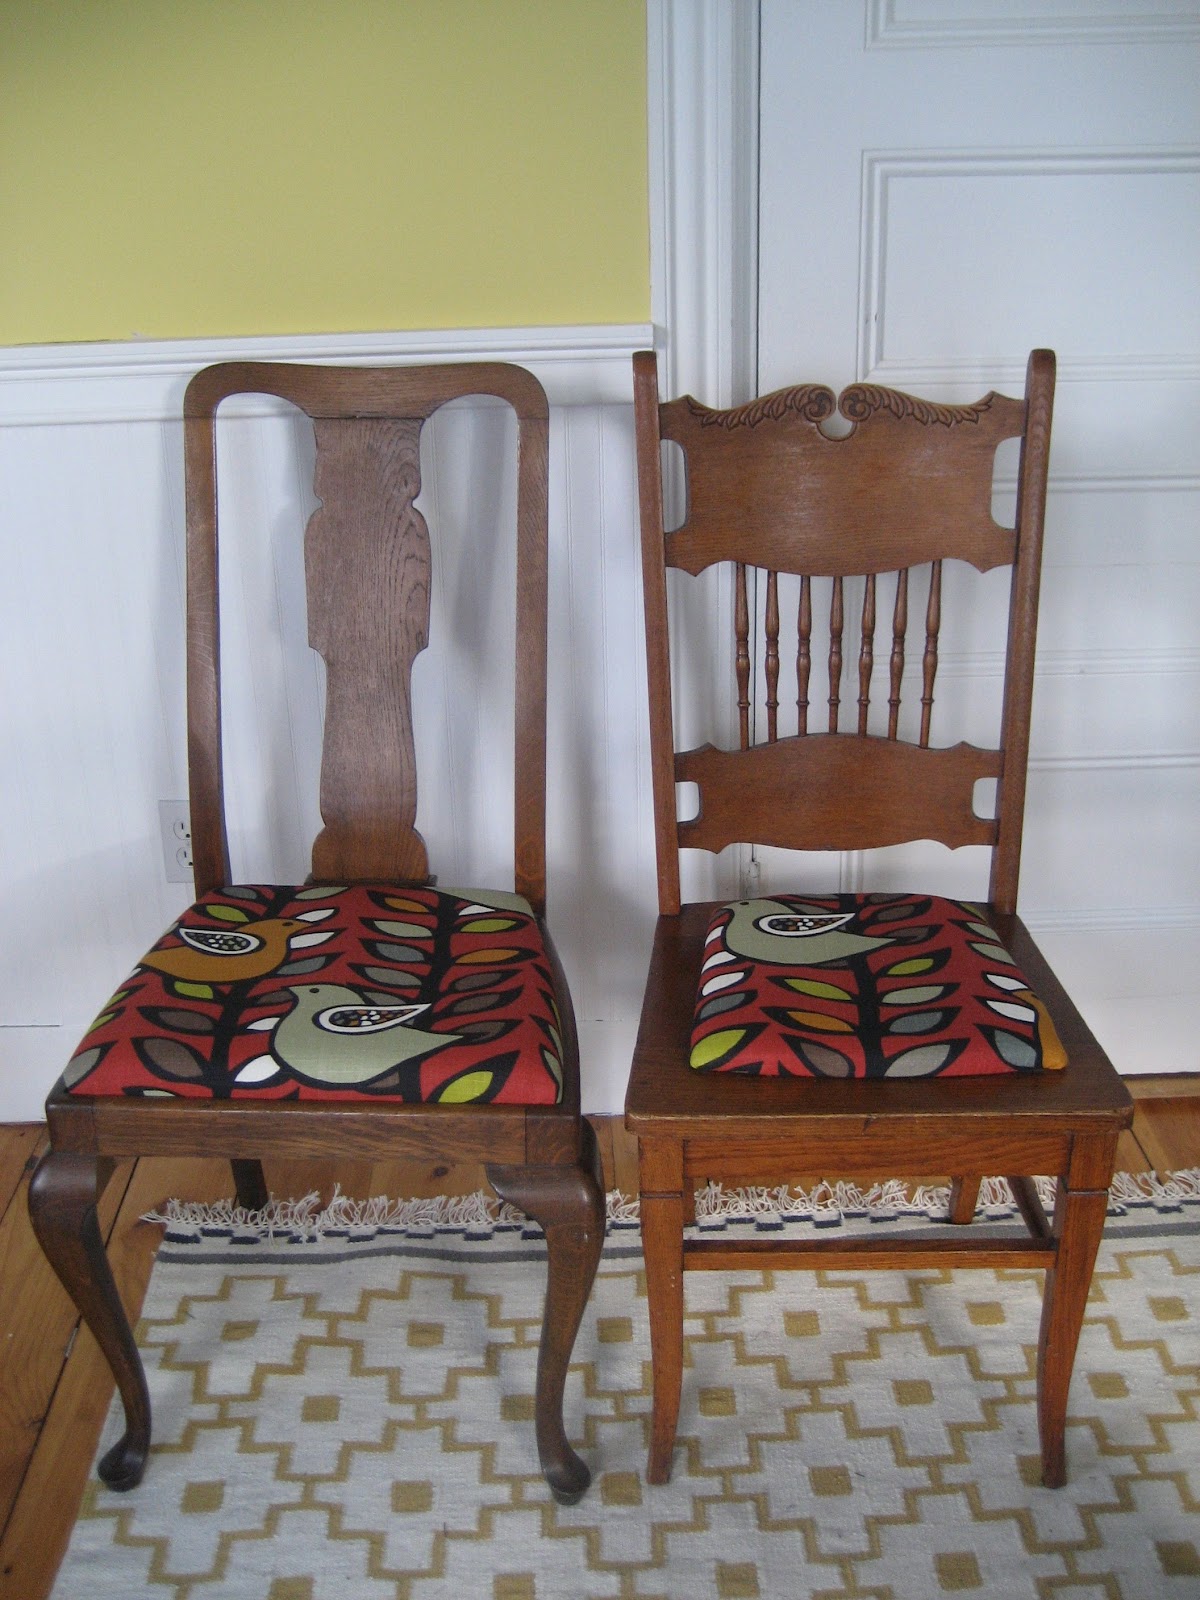
| "Before" chairs, from left to right: previously refinished Queen Anne chair, lone original Queen Anne chair, and "fancy" chair from a second-hand store |
So here’s where I was at the beginning: four Queen Anne-style chairs, three of which had been refinished by my mum (wood stripped and stained, seats re-covered) and one which was virtually untouched; and two second-hand store chairs (which for ease of distinguishing the two sets I will now refer to as “fancy chairs”), which originally had caned seats but now had very worn leather seats.
I tackled the recovering the seats first. When I really examined the Queen Anne chair seats, I realized that they had actually undergone several re-coverings, but that everyone that had done so had just put new fabric right over the old. I decided to strip all the fabric of and maybe add some new foam for a softer seat. Particularly when I found out what was the actual “cushioning agent” in these old chairs.
 |
| "Before" seats, clockwise from top left: pulling away layer #1 to reveal layer #2; layer #3 (groovy); original fabric (on un-refinished chair), and nasty, nasty horsehair. |
HORSEHAIR. Isn’t that super-gross? I thought it was. I was particularly glad I stripped all the layers off outside, because the horsehair was so old that it was disintegrating into a fine dust and getting everywhere. Gag. The other tough part about the seat-stripping process was that the older fabric was attached with ancient, tiny, rusty little tacks that were too small to grab with a regular claw hammer. My dad luckily had a little tool called a cat’s paw (how cute is that?) which worked really well. And in showing my how to use it, he did half the work for me. Bonus.
While I was outside, I figured it was a good time to strip the Queen Anne chair that had never been refinished. The finish was way darker than the other chairs, so I hoped that using a stripping agent would lighten it a bit. That stuff is super-toxic though, not my favorite.
 |
| I think I was actually smiling under the mask. |
It worked OK. What actually worked a lot better was vigorously sanding the crap out of it. That lighted the wood to the point where I thought it would actually take some stain. I used what literally may have been the same can of stain that my mum used to refinish the other chairs, as it looked like it has been in the basement for twenty years or so. After two coats of stain and about four coats of poly, I think the wood tone is pretty reasonably close to the other three. It’s a tiny bit darker and not quite as warm, but good enough for me.

Back to the seats! I now had four completely stripped wooden seat bases for the Queen Anne chairs - no horsehair in sight. The leather and plywood seats from the fancy chairs were in such rough shape, I decided to replace them completely. I used the discarded seat to make a template of the seat shape on kraft paper, which my dad used to cut me two seat bases out of plywood. Then it was a trip to the fabric store for fabric, 1” foam, and batting.
 |
| Thanks, dad! |
 |
| Chosen fabric - I put a bird on it. I can't help it. |
These seats are absolutely the easiest type of reupholstery project - you just layer on all your materials and staple gun that junk to the bottom of the seat. For these seats, I cut the 1” foam to the shape of the seat, plunked it on, then wrapped the batting around it to soften the edges and stapled the batting to the bottom. Then it was just a matter of cutting the fabric a bit bigger than the seats, wrapping it over the batting and foam, and stapling that to the bottom. It’s really easy, you start by putting a staple or two in the middle of each side and then working all the way around. You have to finesse the corners a bit, but honestly the hardest part was deciding where to cut the fabric so that the pattern on the seat was aesthetically pleasing. I obviously bought exactly the amount of fabric I needed and then promptly cut one seat out upside-down, necessitating another trip to the fabric store. Obviously.
 |
| Layering the materials |
 |
| I love staple guns. I got a new one for Christmas, actually. |
Once the seats were covered, I had to reattach the hardware that was holding the fancy chair seats over the hole where the caning had been. Finishing the Queen Anne chairs was as easy as popping the seats back into the chairs. Done! Six relatively similar chairs, tied together by general shape, color and upholstered seats. I’m really happy with the way they came out. I’d show a nice picture of them in the dining room with our new table, but we ordered the table two months ago from West Elm and it’s still backordered. Details!


Hey hon....they are beautiful. So happy to see them still being used by a family member. Great Gram is smiling down on you!
ReplyDeletexo mum
Awesome!!
ReplyDeleteEverything's better with a bird on it!
Nice job Kate. I am in the process of redoing dining room chairs too and was helpful to see how you did it. :)
ReplyDeleteThanks, Wendy! I'm sure your chairs are going to come out great :).
DeleteHi there. Nice blog. You have shared useful information. Keep up the good work! This blog is really interesting and gives good details. Bar Chairs in India, Conference Chairs India.
ReplyDelete